Best practices: Create a New DAW Project Checklist
Getting consistent results starts with a plan and music production is no different. When you begin a new project in your DAW, there are settings that need to be set right from the start.
Imagine a scenario where you start a new project hastily and start recording and get a great take. Or did you? What if you forgot to set you sample rate? Or the filetype? These sorts of settings have the ability to make or break a project.
A great way to make sure that these settings are correct every time you start a new project is to use a checklist. Let’s call this checklist the PreProduction Checklist.
I will outline the PreProduction Checklist, then give a brief description of each item while using my DAW to create a new project and set these settings one by one. I use Logic Pro but most modern DAWs have most of the same options.
The Preproduction Checklist
- Proper Project Name and Location
- Digital Audio Preferences
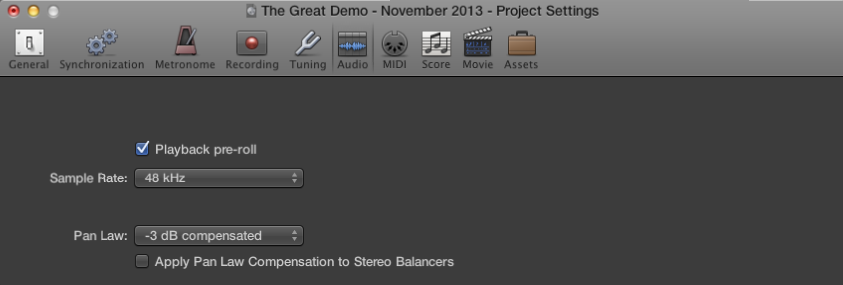
- 48,000 Hz
- 24-Bit
- Use an Uncompressed File Type
- Broadcast wav
- AIFF
- WAV
- Digital Audio Preferences
- Hardware Setting
- Set the In/Out to your Interface
- Buffer Size
- 128 Samples per Buffer
The Preproduction Checklist – Explained
Proper Project Name and Location
Naming your project may seem like a no-brainer right? Wrong. You would be surprised how many people leave the Project they create named “Untitled.”
It is always a good idea to keep your things organized. In the digital realm that means creating a folder on your hard drive that contains all of your DAW projects but it doesn’t stop there. Project names are also important. Project names like Great Song followed hop with Great Song 2 all existing in a folder with Great Song 4 (What happened to #3, I guess we will never know!) Is just as bad if they were all iterations of Untitled.
I like to name my projects in two ways depending on the project. If I am creating a project for myself I will name the project with the working title of the piece followed by the Month and Year.
This is the Song Title – November 29 2013
I have found that sometimes I might want to re-work a song. The date at the end helps to keep the different version separate. If I am creating a project for a band or someone who has come to my studio, I will add their name to the beginning of the project’s name.
The Band – This is the Song Title – November 29 2013
This sort of naming convention will help you tremendously in your efforts to stay organized and to find things later on, when you and your studio have become a busy hub of music creation!
I also like to tick the boxes that tell the DAW to copy all of the files into the project folder. It will take up more space but the archive that it creates and the backups I create will be much more complete. Indeed, the more you copy into the project folder and get backed up the easier it will be to recover from a disaster. With computers, it is not if it will happen, it is when will it happen and will you be prepared.
 Setting the Digital Audio Preferences
The digital audio preferences are the settings that tell you DAW how to deal with the audio you will be recording. It dictates how to record it, how often and how to save it.
The sample rate is the frequency which the DAW polls the audio signal while recording it to disk. The CD standard sample rate is 44,100 Hz, or 44,100 times per second, so it is a great idea to set the recording higher than that standard. It is recommended to set the sampling rate to 48,000 Hz. It is always better to have to take away data than to have to try to add it.
 Bit Rate is the amount of data that the DAW can hold for each track. CD Standard is 16-bit so 24-bit is recommended as it will allow for a greater dynamic range. As bit rate is related to amplitude a great benefit to recording in 24-Bit is that you do not need to record quite so hot. You can leave a little more headroom on the tracks.
 Using an uncompressed file type is essential. You do not want all of your hard word to be degraded just to save some disk space, do you? No, of course you don’t.
Setting the Hardware Preferences
You will want to tell your DAW where the sound is coming from and where it is to go. Specifically, you will want to let your DAW know which interface you are wanting the audio signal to flow into the tracks from. Just as important is telling the DAW what to do with the audio signal. Will it flow out to monitors? Perhaps an amplified PA? Sometimes, the input and output will be the same interface.
You will also want to set the buffer size. The buffer size is the amount of delay the DAW will build into the audio signal between the interface and itself. It does this to make sure that the sound is accurately represented.
Lower buffer sizes reduce latency, but also reduces the number of plugins that can be used. Raising the buffer size increases latency and increases the plugins that can be used.
During recording you should start with 128 samples. During the post production you can bring that number up to 1024 when needed.
 That takes care of the checklist. Using this checklist you will have a perfect starting points for the majority of your projects. One thing I like to do to take this idea a little further is to set a few more options and then create a template file that I can use when creating a new project. That way, all of the preferences that need to be set are and some of the niceties that make it easier and faster to start a new project.
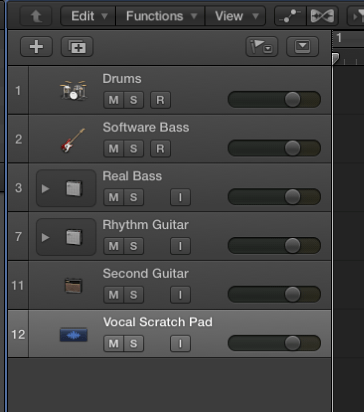
 I create tracks in Logic Pro that I find I need 99% of the time. I pre-name them and color code them so that they are ready to go.
I hope this helps you to get started in the most efficient way possible. Let’s face it, if you have to mess about with the technology to the point where you lose the moment, then recording with a DAW becomes more of a pain. A good plan can go a long way!


