

The Channel Strip
The channel strip found in Apple’s Logic Pro X is much like the channel strips you will find in other DAWs. It mimics the layout of a hardware mixer and adds in lots of extras from the digital world to make our job easier. This lesson will explain the overall function of the channel strip as we use it in the studio and then break down the different components and explain what they do in more detail.
 A mixing board, whether in hardware form or in software form looks daunting at first glance. All of those knobs, buttons, sliders and lights gives the impression that mastery is impossible. Indeed, it is a complex piece of hardware (or software) but it, like anything else is learnable. Especially when you know some of the secrets to using it. The key to understanding a mixing board is that it is a collection of channel strips. A mixing console ( a big mixing board ) like the one on the right is essentially a collection of 32 channels of audio signal. Each channel can be manipulated independently of the other 31 channels and you do that using the functions available in the channel strip.
Generally speaking the audio signal flows from the top ( input ) of the channel strip to the bottom ( output ) with steps in-between to tweak the signal or to send it on another path, or both. The words tracks and channels in this context are sometimes used interchangeably.
As I stated earlier, am I going to explain the functions of the channel strip using Apple’s Logic Pro X. Where beneficial I will point out the more generic names of the functions that would be applicable to most DAWs and hardware mixers. Even though we can think of the signal flowing from top to bottom, channel strips are usually not so literal.
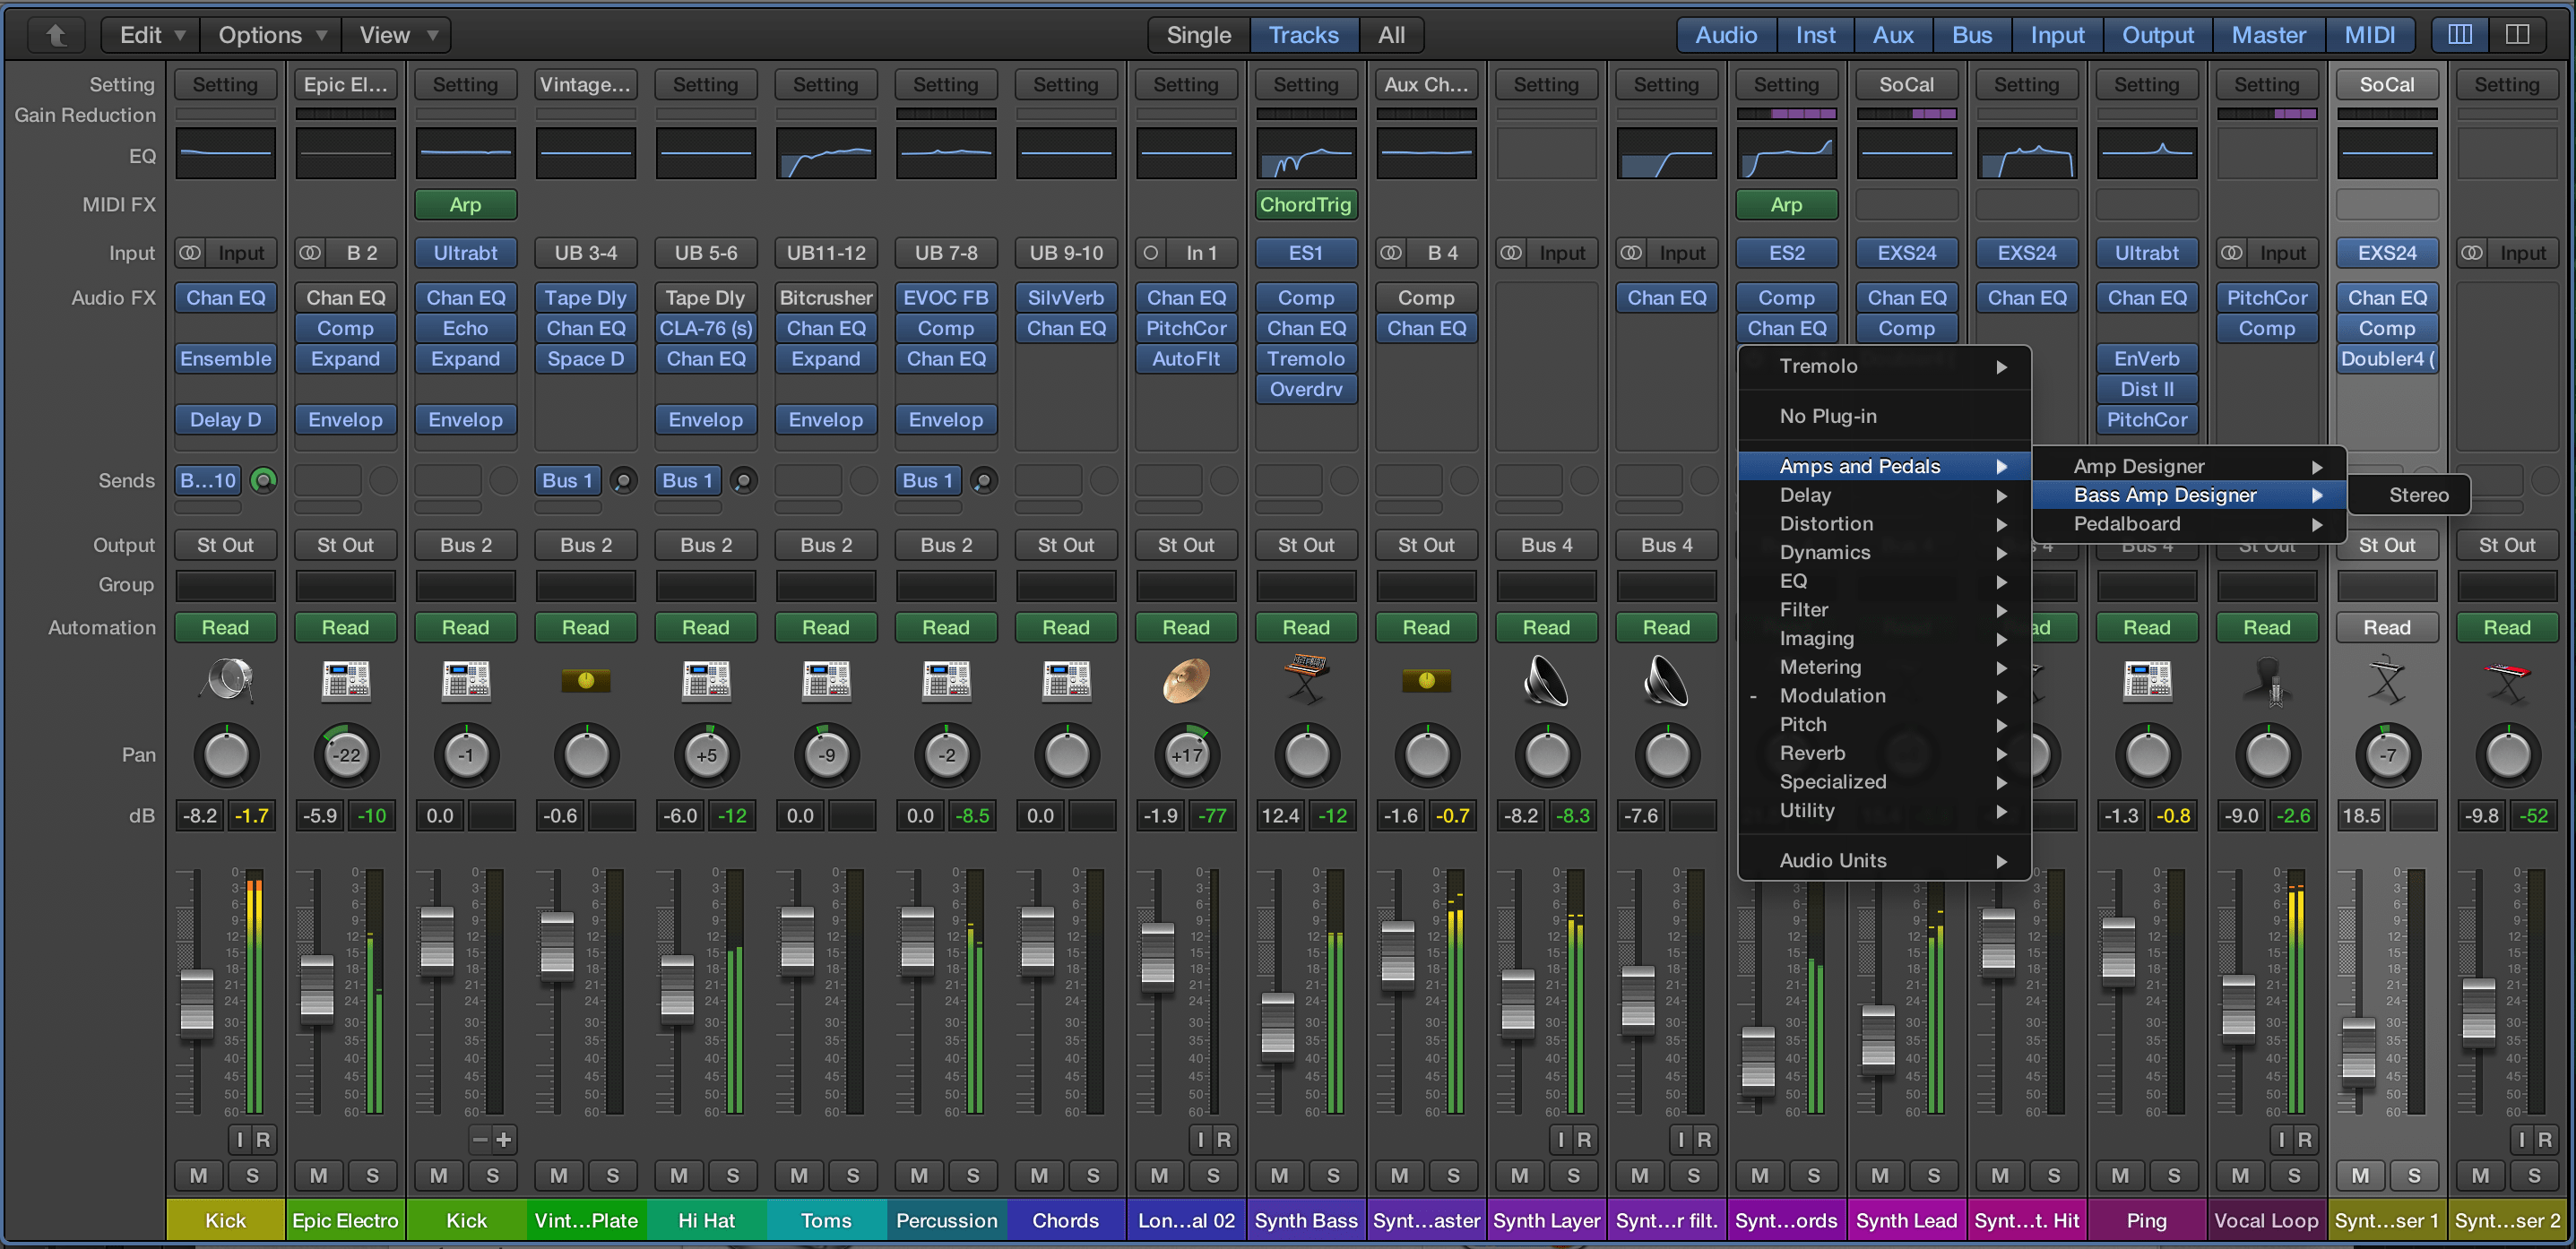 The parts of the channel strip in Logic Pro X are from top to bottom:
- Setting Preset
- Gain Reduction Meter
- EQ Graph
- MIDI Effects
- Input / Instrument Slot
- Audio Effects
- Send Slot
- OutPut Slot
- Group Slot
- Automation Mode
- Pan Knob
- Numeric Output Levels
- Output Fader and Graphical Output Levels
- Input Monitor / Record Arm buttons
- Mute / Solo Buttons
- Channel Name
Let’s have a look at each function in a little more detail.
Setting Preset
![]() In Logic, you are able to set up a channel the way you want, including FX and routing and save the configuration. You can then call up that setting to quickly set all of the channel parameters. This is a very powerful and time saving function.
In Logic, you are able to set up a channel the way you want, including FX and routing and save the configuration. You can then call up that setting to quickly set all of the channel parameters. This is a very powerful and time saving function.
Gain Reduction Meter
![]() This meter show the gain reduction of certain compressors and limiter.
This meter show the gain reduction of certain compressors and limiter.
EQ Graph
![]() The EQ Graph display does double duty as a button to insert and set EQ settings then displays a rough representation of the EQ Settings for quick reference.
The EQ Graph display does double duty as a button to insert and set EQ settings then displays a rough representation of the EQ Settings for quick reference.
MIDI Effects
![]() This is where you would insert an effect processor if the channel is a MIDI channel.
This is where you would insert an effect processor if the channel is a MIDI channel.
Input / Instrument
![]() Click here to choose the input of your instrument, microphone or the output of a sub-mix.
Click here to choose the input of your instrument, microphone or the output of a sub-mix.
Audio Effects
 This is where you would insert effects for an audio channel. Effects are used to alter the signal.
Send Slot
![]() Routes the audio signal to an aux channel. Sends are used to process multiple signals at the same time. For instance, if you have a specific reverb set up, you can use the send slots on any channel to send the signal through that reverb and back. The knob that shows up once a send is created alters the amount of signal to go to the effect set with the send slot.
Routes the audio signal to an aux channel. Sends are used to process multiple signals at the same time. For instance, if you have a specific reverb set up, you can use the send slots on any channel to send the signal through that reverb and back. The knob that shows up once a send is created alters the amount of signal to go to the effect set with the send slot.
Output Slot
![]() This is where the channels output is sent to.
This is where the channels output is sent to.
Group Slot
![]() You can assign a channel to a group of channels. You can use this slot as a button to set what parameters can be manipulated for the group so that that manipulation happens at one time.
You can assign a channel to a group of channels. You can use this slot as a button to set what parameters can be manipulated for the group so that that manipulation happens at one time.
Automation Mode
![]() Sets and displays how the channel will function in automation mode.
Sets and displays how the channel will function in automation mode.
Pan Knob
![]() Sets the channel’s signal in the left and right on a mono channel and the mix between left and right on a stereo channel.
Sets the channel’s signal in the left and right on a mono channel and the mix between left and right on a stereo channel.
Numeric Output Levels
![]() Gives the peak and level information in a numeric form.
Gives the peak and level information in a numeric form.
Output Fader and Graphical Output Levels
 A graphical representation of peak and level information for the camel.
Input Monitor / Record Arm buttons
![]() When you want the signal coming in to a channel strip to be recorded when you start the recording process, you must arm the channel. Arming the channel just tells the DAW to record the information coming into that channel.
When you want the signal coming in to a channel strip to be recorded when you start the recording process, you must arm the channel. Arming the channel just tells the DAW to record the information coming into that channel.
The Input monitor button is how the DAW knows whether you want to hear what is being recorded as it is being recorded.
Mute / Solo Buttons
![]() The mute button attenuates the channel so that you cannot hear it in the mix at all.
The mute button attenuates the channel so that you cannot hear it in the mix at all.
The solo button attenuated all other channels so that you only hear that one channel.
Channel Name
![]() It is always very important to give your channels meaningful names
It is always very important to give your channels meaningful names
These are the basic functions of the channel strip. There are more advanced features that one might spend time learning. These function however are present in all DAWs and on most mixing boards.